Web resource: Identify poultry water system contamination challenges (PDF, 244KB), University of Arkansas, United States
Procedure
A water sample taken from the end of a water line may not accurately reflect the biofilm present in the water distribution system. Swabbing can be used to investigate biofilms in the water distribution system and the concentrations of associated microbes. Comparing multiple points in the distribution system to the end of the line will give growers a better understanding of the concentrations and type of biofilm, which will enable the development of targeted cleaning.
Sampling points
Samples should be collected at points where biofilms are likely to be an issue, using a sterile vial and tweezers. Pre-made swab kits are usually available from laboratories conducting the analysis. Swabs can be made by putting a 2.5cm dry cellulose sponge into a 50ml vial that contains 25ml of Butterfield’s Phosphate Diluent (BPD). The laboratory should be contacted for sampling and sample transport advice.
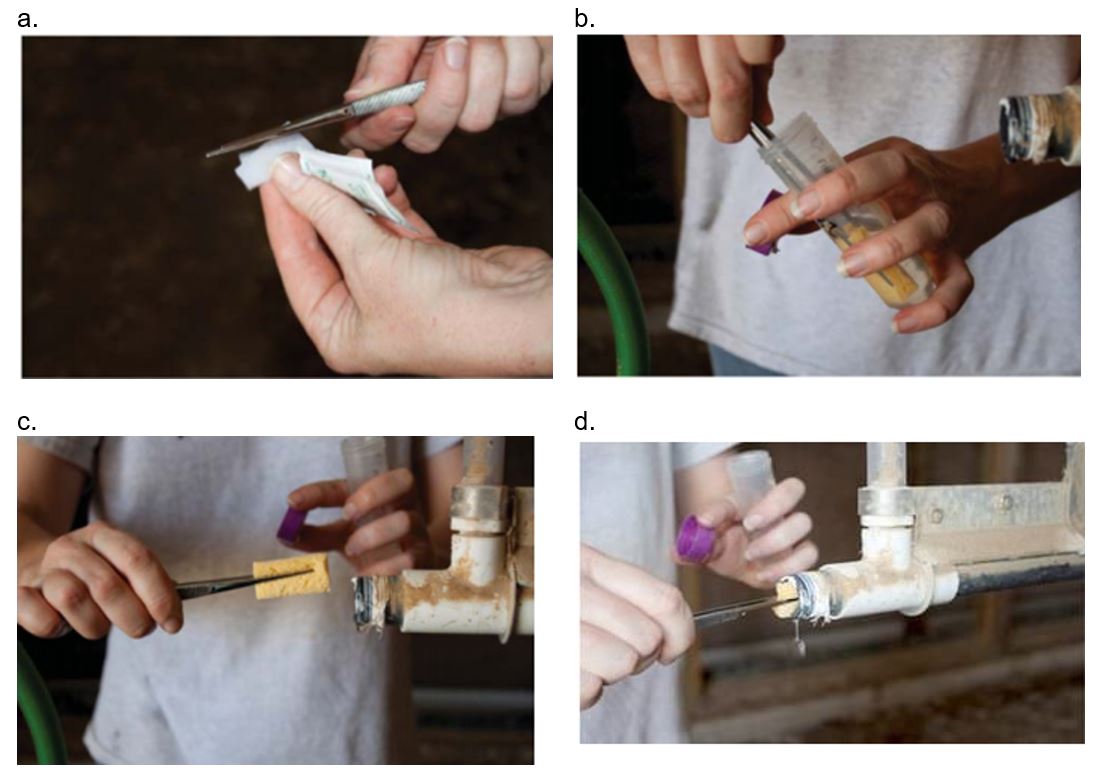
General sampling procedure (see Figure 7 for visual aid)
- Shut the water off to the water line being tested.
- Allow excess water to drain out so the sponge will absorb biofilm rather than water. If a valve cap is present, remove it. Do not sample through the valve cap as it will not be a representative sample.
- Wipe off the outside threads of the water line with a 99% alcohol solution.
- Sterilise a pair of extra-long tweezers.
- Remove the cap of the swab vial. Do not allow it to touch the edge of the vial or anything that could contaminate it.
- Grasp the swab with the sterilised tweezers and squeeze out the excess moisture into the vial.
- Remove the swab from the vial and insert it at least 4 inches into the open pipe. Twist the swab as it goes in and back out of the pipe.
- Replace the sponge into the BPD or sterile water in the 50ml vial and tighten. Vigorously shake the vial to release an even number of bacteria from the sponge into the BPD solution. Fill out the requisition.
- Put the sample in a cooler filled with ice packs.
- Reassemble waterline and drinker components and check water delivery at drinkers.
- Arrange transport to the laboratory.
- Interpretation of results: Desirable results are counts of 0–100CFU/mL. Results in the range of 1000–10,000CFU/mL indicate that a marginal level of contamination. Results greater than 100,000CFU/mL indicates that the water distribution system would benefit from cleaning.