
Dry cleaning is the first step of decontamination. Dry cleaning involves the removal of litter, feed and organic matter accumulated on various surfaces of the shed. It is recommended farms use an insecticide approved by the Australian Pesticides and Veterinary Medicines Authority (APVMA) for use in poultry sheds (Appendix 4) immediately after birds are removed and before litter removal. The timing is important because as the shed cools down following bird removal, insects will emerge from the litter and vacate the shed, hence the importance of spraying surfaces immediately. If there is a heavy infestation of insects and beetles, a second round of insecticide application is highly recommended post-wash after the shed is dry and a few days before sanitisation (surfaces on which insecticide is applied must be dry before sanitiser application).
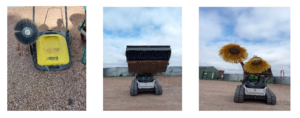
Australian poultry farms use a wide range of equipment to dry clean sheds, including compressors, brushes, shovels, blowers, compressors, heavy-duty vacuum cleaners, road sweepers, telehandlers, mechanical brooms, bobcats and tractors with buckets and snowploughs. Figures 1, 2 and 3 show a selection of equipment used by Australian poultry farms for dry cleaning.
Farms that reuse litter must ensure litter is composted for at least 3-7 days. Composting litter prior to reuse ensures reduction of pathogens in the litter. Composting litter can be achieved by piling or heaping litter in the shed between batches. The main purpose of heaping or piling is to allow the litter to reach a high enough temperature to kill pathogens. In addition, the compost must be protected from moisture and water. Excess moisture or water can decrease the composting effect and increase the pathogen load in the reused litter. See Wiedemann (2015) for further information.
Once litter is removed, dust from surfaces such as walls, light fixtures, cages, nest boxes, elevator platforms in multi-tier cages, control panels, cameras, egg conveyor belts, perches, fans and air inlets must be blown or swept to the floor. Feed from feeders must be removed manually. Blowers can also effectively remove feed from feeders where manual emptying is not possible, or to remove dust residue. It is recommended a backpack blower be used for dry cleaning. Accumulated manure from perches, pop holes, sidewalls, nest boxes and other surfaces must be scraped off before the shed is washed. The shed floor must be swept or vacuumed after dry cleaning of all surfaces.
All litter and organic matter removed from the shed needs to be disposed in a biosecure manner, either offsite at a composting facility or at a designated composting site on farm, preferably at least two kilometres from the poultry and sheds.
Once dust and dirt are removed from electrical fixtures, control panels and other surfaces that cannot be washed, these surfaces must be wiped with sanitiser spray. Ensure a clean paper towel is used for wiping these surfaces. Cover these surfaces securely with clean plastic bags before commencing the washing step.
Cool cell pads should be flushed with an acid-based cleaner to remove the build-up of scales and biofilms inside the pipes. The use of an acid-based cleaner in the cooling systems will prevent the insect and spider infestation as the highly acidic environment is unfavourable for insects and spiders.
It is recommended drinker lines be flushed with an acid-based cleaner. The cleaner should be left in the drinker lines for a minimum of 12 hours. This will ensure the effective removal of biofilms present inside the drinker lines. After 12 hours, the water lines must be adequately flushed, and the pH must be verified at the end of the water line to ensure all acid is rinsed out. This is confirmed by the pH at the end of the water line matching what it is at the potable water source (normally pH 6-8) (Figure 4).
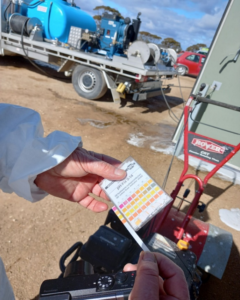
Figure 4. Checking pH levels using a testing kit